Categories
Blog

Why Core Strength Matters

Your core is your body’s power center. A strong core helps you:

  • Stand taller
  • Sit straighter
  • Balance better
  • Avoid back pain
  • Lift and move with ease
  • Improve posture
  • Make daily activities like carrying groceries or picking up your kid feel easier

Even things like walking, bending, and turning rely on good core strength. So if you’re thinking, “Should I work on my core?” the answer is a big yes. Building your core from the ground up gives you better control over your whole body.

Best Core Exercises for Beginners

These exercises for the core for beginners are simple, effective, and don’t require fancy gym equipment. Just grab a mat or a towel, and you’re ready to go. These movements target your deep core muscles and help build a solid foundation.

1. Dead Bug

This silly-sounding move is awesome for teaching your core to stay steady.

  • Lie on your back with arms up and knees bent 90 degrees.
  • Slowly lower your right arm and left leg toward the floor.
  • Keep your lower back flat on the ground.
  • Bring them back up and switch sides.
  • Do 10 reps on each side.

Why it works: It activates your core muscles without straining your neck or spine. It also improves coordination and builds control.

2. Glute Bridge

This move strengthens your core, butt, and lower back.

  • Lie on your back with knees bent and feet flat.
  • Press your feet into the floor and lift your hips up.
  • Squeeze your glutes at the top, then lower slowly.
  • Try 3 sets of 10.

Why it works: Glute bridges target your entire posterior chain, which includes your core and hips. They’re also great for waking up sleepy glutes from sitting too much.

3. Bird-Dog

Great for balance and stability.

  • Get on all fours.
  • Extend your right arm and left leg.
  • Keep your back flat and abs tight.
  • Return and switch sides.
  • Do 10 reps per side.

Why it works: Bird-dogs improve core stability, balance, and focus. It’s a favorite among physical therapists because it teaches your body to move with control.

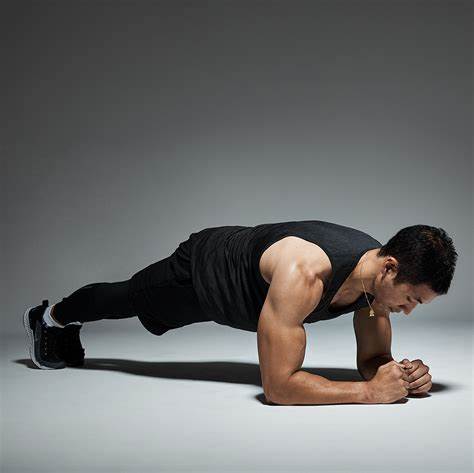
4. Plank (Knees or Toes)

Start with your knees down if you’re new. It still works your core!

  • Place elbows under shoulders.
  • Keep back flat and tummy tight.
  • Hold for 15–30 seconds. Work up to longer!

Why it works: The plank hits almost every muscle in your core. It’s also a great way to train endurance without moving around too much.

5. Toe Taps

A gentle core workout that teaches control.

  • Lie on your back, knees up at 90 degrees.
  • Slowly lower one toe to tap the floor.
  • Bring it back and switch legs.
  • Do 10 taps per side.

Why it works: Toe taps are a low-impact move that challenges your core’s ability to stabilize while your legs move.

6. Standing Side Crunches

No floor needed! This one is great if you’re not ready to get on the ground.

  • Stand tall with hands behind your head.
  • Lift your right knee and crunch your right elbow toward it.
  • Return and switch sides.
  • Aim for 15 per side.

Why it works: Standing core exercises get your heart rate up and work your obliques while keeping pressure off your back.

Building Your Beginner Core Routine

Don’t overdo it—your core needs time to get stronger just like any other muscle. Try this sample workout:

Beginner Core Routine (3x per week)

  • Dead Bug – 10 per side
  • Glute Bridge – 10 reps
  • Bird-Dog – 10 per side
  • Plank – Hold for 20 seconds
  • Toe Taps – 10 per leg
  • Side Crunches – 15 per side

Rest for 30–60 seconds between each move.

Week 1–2:

Focus on learning the moves and building consistency.

Week 3–4:

Increase reps slightly and hold planks longer—aim for 30–45 seconds.

Week 5 and beyond:

Mix in new exercises, increase sets, or combine these with full-body workouts.

Tips for Success

  • Focus on form. Quality beats quantity. Keep your movements controlled.
  • Breathe! Don’t hold your breath. Exhale during the hard part.
  • Go slow. These aren’t race moves. Control is the goal.
  • Stay consistent. Results come from showing up regularly.
  • Add on gently. Once things feel easy, increase reps or time.

Use a mirror. Helps you check your form and avoid slouching.

Core Strengthening Exercises for Beginners (If You Want to Mix It Up)

Here are a few more beginner-friendly core strengthening exercises you can swap in as you grow stronger:

1. Modified Side Plank

  • Lie on your side, knees bent.
  • Prop up on your elbow.
  • Lift hips and hold.
  • Try 15 seconds each side.

Why it works: It targets your obliques (side abs) and improves stability.

2. Seated Knee Lifts

  • Sit on a sturdy chair or bench.
  • Lean back slightly, hands on the sides.
  • Lift knees up slowly, then lower.
  • Do 10 reps.

Why it works: Great for beginners who need back support while training the core.

3. Wall Sits with Arm Reach

  • Slide down a wall like you’re sitting on a chair.
  • While holding the wall sit, reach one arm up at a time.
  • Keep your core tight!

Why it works: Adds core engagement to a lower-body strength move.

4. Marching Glute Bridge

  • Start in a glute bridge position.
  • Lift one foot off the floor and hold for 2 seconds.
  • Alternate legs.
  • Do 10 reps per side.

Why it works: Challenges your core to stay steady while one side moves.

5. Tabletop Arm and Leg Extensions

  • Lie on your back with knees up and arms straight above you.
  • Extend opposite arm and leg, then switch.

Why it works: Similar to dead bugs, this move builds coordination and control.

6. Reverse Crunch

  • Lie on your back with knees bent.
  • Lift knees toward chest and curl your hips off the floor.
  • Lower slowly and repeat.

Why it works: This targets the lower part of your abs—where most people feel weakest.

Fun Ways to Add Core Work Into Your Day

If you’re short on time or want to stay active, try sneaking in mini core sessions:

  • Do a 30-second plank before brushing your teeth.
  • Try toe taps during TV commercial breaks.
  • Do bird-dogs as part of your morning stretch.
  • Walk tall with a tight core—pretend someone’s pulling you up by a string!
How do I strengthen my core as a beginner?

Start with bodyweight moves like dead bugs, glute bridges, and planks—focus on form, go slow, and be consistent.

Dead bugs, bird-dogs, and planks are three of the best beginner-friendly core exercises.

Many experts refer to planks, sit-ups (or crunch variations), and leg raises as the “big 3” for core work.

No single move targets belly fat, but planks and compound moves that engage the full body burn the most calories overall.

Nutrition and Core Strength

Remember, building visible abs is also about what you eat. While beginner core exercises help you feel stronger, pairing workouts with smart food choices can help reduce belly fat. Think whole foods like lean proteins, fruits, veggies, and whole grains. Stay hydrated and skip the sugary drinks!

Again—we’re not doctors or dietitians, so if you’re changing your diet in a big way, it’s best to talk to a pro.

Categories
Blog

Chest Workout Routine: Your Guide to Chest Day Gains

We love a good chest day, don’t you? There’s just something about finishing your reps and feeling that pump right through your t-shirt. Whether you’re brand new to the gym or you’re a seasoned lifter, having a solid chest workout routine can make all the difference. In this guide, we’ll walk you through everything you need to know to crush your chest day workout routine—with tips, exercises, and some friendly reminders (like, hey, we’re not doctors!).

Why a Chest Workout Routine Matters

Your chest muscles do more than just help you look good. They’re essential for pushing, lifting, and stabilizing your upper body. A strong chest helps with posture, athletic performance, and everyday tasks (like moving furniture or pushing a stroller). With the right chest day workout routine, you’re not just building strength—you’re building real-life function too.

Strong pecs (that’s your chest muscles) also support your shoulders. That means fewer injuries when doing upper body lifts and better results when you work your back, arms, or even core. So yeah, chest day isn’t just about flexing—it’s about being strong all over.

We built this routine to hit all angles of your chest—upper, middle, and lower. It’s got both machines and free weights, so feel free to tweak it based on what you’ve got access to.

Warm-Up (5-10 minutes)

  • Arm circles
  • Light band pull-aparts
  • Push-ups (2 sets of 10)

Warming up matters. It gets blood flowing, wakes up your joints, and gets your brain ready to lift.

Main Chest Day Workout Routine

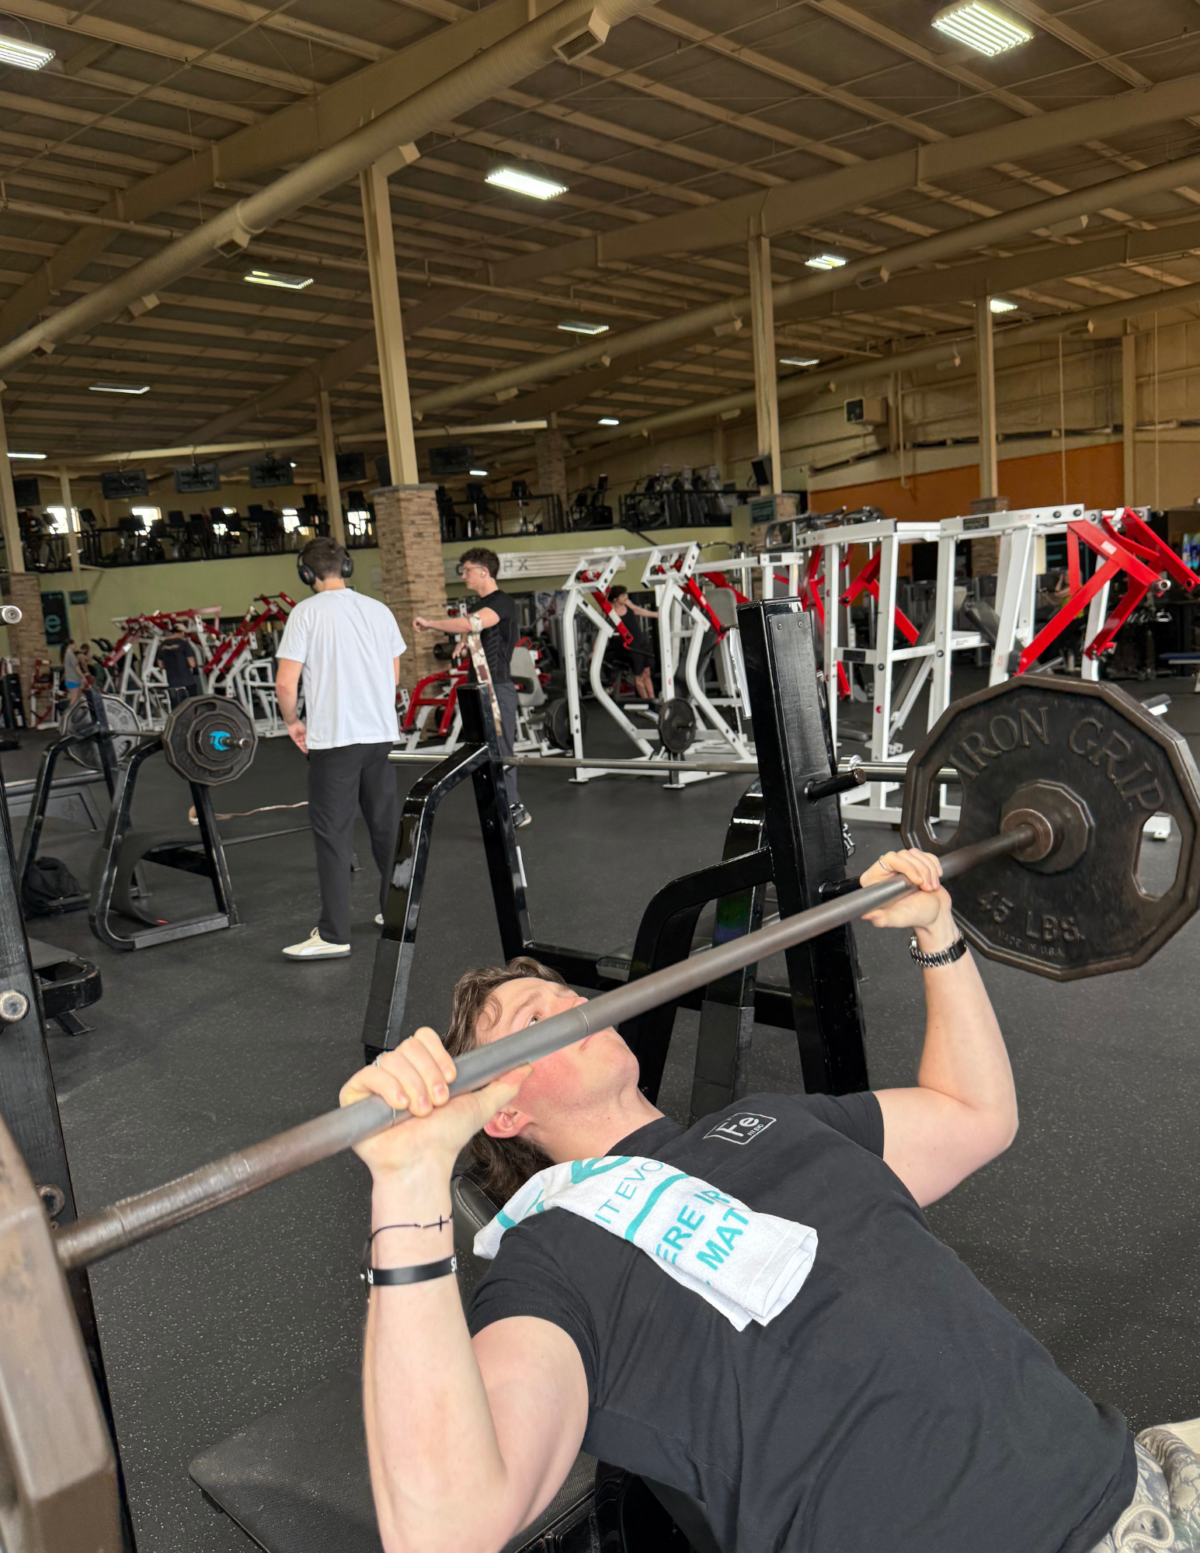
  1. Flat Barbell Bench Press – 4 sets of 8-10 reps
    This is your bread and butter. Go heavy (but safe).
  2. Incline Dumbbell Press – 3 sets of 10-12 reps
    Targets the upper chest. Keep the angle around 30 degrees.
  3. Chest Fly Machine or Dumbbell Fly – 3 sets of 12-15 reps
    Focus on the stretch and squeeze here.
  4. Push-Ups – 3 sets to failure
    Classic, simple, effective.
  5. Cable Crossover (High to Low) – 3 sets of 15 reps
    Great for your lower chest. Keep control through the motion.
  6. Dips (Chest Focused) – 2-3 sets to failure
    Lean slightly forward to target the chest more than triceps.
  7. Incline Cable Flys or Machine Press – 3 sets of 12 reps
    If you’ve got the energy, this is a killer finisher.
  • Use full range of motion – Half reps = half gains.
  • Don’t bounce the bar off your chest – Control is key.
  • Keep your shoulders safe – Don’t flare your elbows too much.
  • Hydrate – Muscles need water!
  • Rest between sets – 60–90 seconds is plenty.
  • Breathe properly – Exhale on the press, inhale on the way down.

The little things add up. One small tweak to form can make all the difference in results—and safety.

If you’re not sure how to build a schedule, here’s one to start:

Day 1: Chest + Triceps
Follow the workout above and add in some triceps pushdowns or skull crushers.

Day 4: Chest (Light Day or Variation)
Focus on machines, high reps, and technique. You could even try dumbbell-only movements or tempo training.

Want to go next level? Try a “pre-exhaust” session: do flys or push-ups before your main lifts to tire out the chest first. You’ll feel the burn fast.

How to Progress Over Time

To keep growing and avoid plateaus, here are a few ways to switch it up:

  • Increase weight gradually
  • Try new angles (like decline presses)
  • Add more volume (extra sets or reps)
  • Slow down your tempo
  • Add drop sets or supersets

You can also change your grip width or swap dumbbells for machines to mix things up. The key? Keep your body guessing (in a good way).

Keep a workout log so you can track progress week to week. Small wins add up over time.

Ready to push yourself further? Try one of these bonus finishers:

  • 100 Push-Up Finisher: Break it up however you want. Get it done by the end of the workout.
  • Drop Set Machine Flys: Start heavy, then lower the weight each set with no rest.
  • Tempo Press Challenge: 3 seconds down, 1 second pause, 1 second press—for 8 reps.

These burnouts are a fun (okay, painful) way to end strong.

Recovery: Don’t Skip It

Rest days are just as important as your workout days. Your chest muscles need time to grow, so don’t hit chest every single day. Aim for 48 hours between sessions.

And don’t forget to eat right—your body needs protein and healthy carbs to rebuild muscle. Foam rolling and light stretching also help ease soreness.

You could also add:

  • Light cardio on rest days to get blood flowing
  • Magnesium and electrolytes for muscle recovery
  • Sleep—aim for 7–9 hours per night!

Your body doesn’t grow in the gym. It grows when you rest. Treat recovery like part of your routine.

Let’s dodge a few classic blunders:

  • Too much ego lifting: It’s better to lift lighter with good form than go heavy and risk injury.
  • Skipping warm-up sets: Cold muscles are tight muscles. Warm ‘em up.
  • Neglecting the lower chest: That’s where dips and cable crossovers shine.
  • Not tracking progress: If you don’t know what you lifted last week, how can you improve?
  • Ignoring form: Arching too much or rushing through reps can cause shoulder pain.
  • Same workout, every week: Mix it up. Keep things fresh.

Mistakes are part of learning—but the faster you fix them, the faster you grow.

We’re Not Doctors!

Just a friendly reminder: this is general advice based on experience and research. Always talk to a certified trainer or medical professional if you have health concerns or injuries.

Everyone’s body is different. Listen to yours.

What is the best chest workout routine?

A balanced routine with bench press, incline dumbbell press, flys, and dips hits all areas of your chest and builds strength and size.

Yes, if those 4 exercises hit different areas of the chest and are done with good intensity and form, you’re good to go.

This method combines 6 heavy reps, 12 moderate reps, and 25 light reps into one set for serious chest fatigue and growth.

Absolutely! 5×5 is great for strength-building, especially with compound moves like bench press.

Stick with this chest workout routine, listen to your body, and stay consistent. You don’t need fancy equipment or a complicated plan—just effort, form, and a little chest-day magic.

Show up, do the work, and that chest will grow.

Categories
Blog

Why Chest Workouts Matter

If you’ve got a pair of dumbbells and some motivation, you’ve got everything you need for a solid chest workout at home or at the gym. You don’t need fancy machines or a bench press to build a stronger chest—just a few smart moves and consistent effort. In this guide, we’re breaking down the best chest workouts with dumbbells, including beginner-friendly exercises, targeted lower chest workout with dumbbells, and tips to get the most out of each rep. Just a heads up: we’re not doctors, so always listen to your body and talk to a professional if you’re unsure about starting a new routine.

Why Chest Workouts Matter

A strong chest isn’t just for looks. Your chest muscles (mainly the pectoralis major and minor) play a big role in pushing movements, shoulder support, and overall upper body strength. From picking up your kids to pushing a shopping cart, these muscles are always in action.

Dumbbell workouts are great because:

  • They allow for a greater range of motion than machines.
  • They help fix strength imbalances between your left and right side.
  • They can be done at home with minimal space.

Let’s dive into the best ways to train your chest with dumbbells.

Here are some of our favorite dumbbell exercises that target the full chest:

1. Dumbbell Chest Press

Lie on a flat bench or the floor. Hold a dumbbell in each hand, elbows bent at 90 degrees. Press them up until your arms are fully extended, then slowly lower back down.

Tip: Pause at the bottom of the movement for 1-2 seconds to eliminate momentum and fire up those muscles.

2. Dumbbell Chest Fly

Start like the chest press, but instead of pressing straight up, bring your arms wide like you’re hugging a big beach ball, then bring them back together at the top.

Tip: Slightly bend your elbows and keep the motion controlled. You want to feel the stretch, not strain your shoulders.

3. Incline Dumbbell Press

If you’ve got an adjustable bench, set it to an incline. This angle puts more focus on your upper chest. Press the weights up and together, then lower them slowly.

Tip: Use lighter weights if you’re new to this to avoid shoulder strain.

4. Dumbbell Squeeze Press

Hold the dumbbells together at the center of your chest. Press up while squeezing the weights toward each other. This move really lights up the inner chest.

Tip: Focus on the squeeze throughout the movement. It’s not about how high you press but how tight you press.

5. Standing Dumbbell Press (Modified Push)

Stand upright and press the dumbbells out in front of you from chest height. This works your chest and shoulders without needing a bench.

Tip: Keep your core tight and avoid leaning backward.

Lower Chest Workout With Dumbbells

Targeting the lower chest can help build that well-rounded look. Here’s how to focus on it with dumbbells:

1. Decline Dumbbell Press (Bench or Floor)

If you have a decline bench, use it to angle your body downward. Press the dumbbells from your chest, focusing on the lower portion of your pecs.

No decline bench? Lie on the floor and elevate your hips slightly with a pillow or by placing your feet on a raised surface.

2. Dumbbell Pullover

Lie on a flat bench or floor. Hold one dumbbell with both hands above your chest. Lower it behind your head in an arc, then bring it back. It hits the chest and lats.

Tip: Don’t go too heavy on this one. Form matters more than weight.

3. Reverse Grip Dumbbell Press

Change your grip so your palms face your face (like a curl grip). Press the dumbbells up. This small change targets the lower chest more.

Tip: Keep your wrists strong and don’t let them bend backward.

4. Decline Dumbbell Fly

Similar to the fly, but on a slight decline. Lower the dumbbells wide, then squeeze your chest to bring them together.

Tip: Slow the motion for more time under tension.

Don’t have a bench? No problem. You can do a killer dumbbell chest workout right on the floor.

1. Floor Press

This is just like the dumbbell chest press, but on the ground. It limits the range of motion slightly, but still works your pecs well.

Tip: Pause just before your elbows touch the ground to keep the tension.

2. Floor Fly

Lie flat and perform flys with a slight bend in the elbows. Stop before your elbows touch the floor to keep the tension on the chest.

Tip: A yoga mat or padded floor helps protect your joints.

3. Standing Chest Squeeze

Hold a dumbbell vertically in front of your chest with both hands. Squeeze your hands together like you’re trying to crush it. Push it forward, then pull it back in.

Tip: Go slow and controlled for maximum burn.

4. Dumbbell Push-Ups

Hold dumbbells on the ground as push-up handles. This gives your wrists a break and helps increase range of motion.

Tip: Make sure the dumbbells are flat and stable so they don’t roll.

5. Front Raise Chest Hold

Hold a dumbbell with both hands and raise it straight out in front of you to shoulder height. Hold for 10-15 seconds.

Tip: This isometric move targets the chest and works your mental toughness, too.

  • Go slow: Fast reps = momentum. Slow reps = muscle work.
  • Focus on form: Keep your shoulders back and don’t arch your lower back.
  • Breathe: Exhale as you push the dumbbells up. Inhale as you lower them.
  • Progress over perfection: Increase your weight or reps as you get stronger.
  • Don’t skip warm-ups: Even just 5 minutes of dynamic stretches can help prevent injury.

Recovery matters: Let your chest rest at least 48 hours before hitting it hard again.

Simple Chest Day Dumbbell Routine (No Bench)

Here’s a quick and simple chest workout with dumbbells you can try at home:

Warm-Up (5 Minutes): Arm circles, push-ups, shoulder rolls, light dumbbell shoulder presses

Workout:

  • Floor Press – 3 sets of 10
  • Floor Fly – 3 sets of 10
  • Standing Chest Squeeze – 3 sets of 12
  • Dumbbell Push-Ups – 3 sets to failure
  • Front Raise Chest Hold – 3 rounds of 10-15 second holds

Cool Down (5 Minutes):

  • Cross-body arm stretch
  • Doorway chest stretch
  • Shoulder rolls
  • Deep breathing

Want a challenge? Repeat the full workout twice.

Want to grow your chest over time? Try this 4-week structure:

Week 1-2:

  • Stick with lighter weights
  • Focus on form and full range of motion
  • 3 chest workouts per week

Week 3-4:

  • Increase dumbbell weight slightly
  • Add an extra set to each move
  • Add 1 additional chest-focused move (like the decline fly or pullover)

You can repeat this cycle and adjust weight and reps every month for continued growth.

Can you build chest with dumbbells?

Absolutely. With the right exercises and consistency, dumbbells can help grow and shape your chest.

Dumbbell chest press, dumbbell fly, and incline dumbbell press are great go-to moves.

Yes, especially if they target different areas of the chest and are done with intensity.

Exercises like the dumbbell squeeze press and flys, combined with slow reps and short rest, give a strong pump.

Dumbbells are a great way to build chest strength without needing a full gym setup. Whether you’re after definition, size, or better performance in everyday life, these moves can help. Be patient with progress, listen to your body, and keep things fun. And remember—we’re not doctors, so always check in with a health professional if you’ve got concerns or existing injuries.

With the right mindset and consistency, your chest gains are just a dumbbell session away. Let’s get stronger, together!

Categories
Blog

What Is a Chest Press Machine?

If you’re just getting into strength training or want to level up your chest day, the chest press machine is one of the best tools to have in your corner. Simple to use and super effective, it targets your chest muscles safely and helps you build strength with confidence. Whether you’re at a big gym or just exploring the equipment at your local fitness center, chances are you’ll spot one of these machines front and center.

Let’s dive into how this machine works, what muscles it hits, how it compares to the chest fly machine, and how to make the most of your machine chest press days.

Quick note: We’re not doctors or medical professionals, so always talk to your doctor or a certified trainer before starting something new.

What Is a Chest Press Machine?

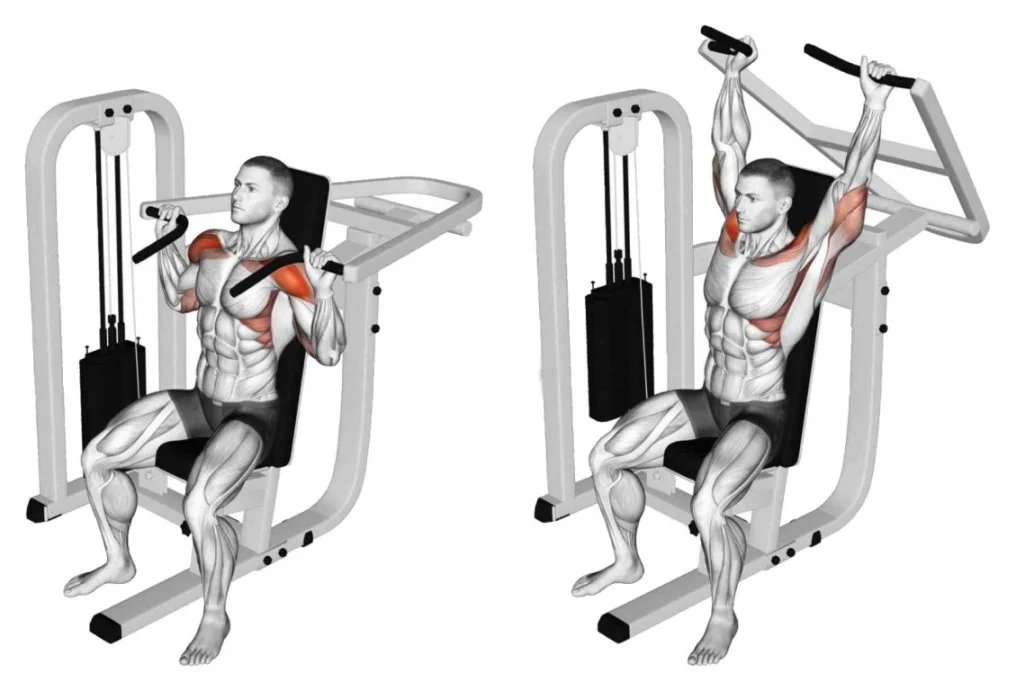
A chest press machine is a piece of gym equipment that mimics the motion of a traditional bench press but uses a guided path to help you stay aligned and safe. You sit down, grab the handles, and push forward—kind of like a seated push-up but with resistance.

These machines come in different styles:

  • Seated Chest Press Machine: You sit upright with handles at chest level.
  • Incline Chest Press Machine: Targets your upper chest more by positioning the seat lower.
  • Decline Chest Press Machine: Aimed at the lower chest with the seat set higher.

No matter the angle, the idea is the same: you’re pushing weight away from your body using controlled motion.

The machine chest press is all about hitting your upper body—especially your chest. Here’s a breakdown:

Main Muscles:

  • Pectoralis Major: Your big chest muscle.
  • Triceps: Help with the pushing motion.
  • Deltoids (Shoulders): Especially the front part.

Supporting Muscles:

  • Core muscles: Keep you stable while you push.
  • Biceps: Not the main players, but they help a little.

The beauty of the chest press machine is it gives you a solid chest workout without needing a spotter or worrying about balancing a barbell.

Now, let’s talk about how the chest press machine stacks up against the chest fly machine. These two machines both work your chest, but in different ways.

Chest Press Machine:

  • Motion: Pushing forward.
  • Muscles: Chest, triceps, shoulders.
  • Feel: More like a bench press.
  • Best for: Building strength and size.

Chest Fly Machine:

  • Motion: Arms move in a hugging motion.
  • Muscles: Isolates the chest.
  • Feel: Stretch and squeeze.
  • Best for: Shaping and defining the chest.

If you’re aiming for overall chest strength, go for the press. If you want to shape the muscle and get that deep chest squeeze, the fly is your friend.

Many advanced lifters even combine both in one session. Start with the chest press to build raw strength, then finish with chest flys to stretch and pump the muscle.

Here’s why this machine is so popular:

  • Safe for beginners: Guided motion means less chance of injury.
  • No need for a spotter: Push yourself without worry.
  • Focus on form: Helps you stay aligned.
  • Build confidence: Great way to ease into free weights later.
  • Efficient chest engagement: Delivers quick results when used properly.
  • Easier recovery: Low risk of form breakdown helps with recovery if you’re coming back from injury.

This makes it perfect for anyone who’s just starting or coming back from a break.

How to Use the Chest Press Machine

Using the chest press machine is pretty straightforward, but here’s a quick guide to doing it right:

  1. Adjust the seat: Your hands should be at chest level when you grab the handles.
  2. Set the weight: Start light to get the feel for it.
  3. Grip the handles: Palms facing down, elbows bent.
  4. Press out: Push the handles forward until your arms are almost straight.
  5. Return slowly: Let the handles come back with control.

Pro Tip:

Don’t lock your elbows at the top. Keep a slight bend to protect your joints.

Suggested Reps and Sets:

  • Beginners: 3 sets of 10–12 reps at light to moderate weight
  • Intermediate/Advanced: 4 sets of 8–10 reps with heavier resistance

Once you’ve mastered the basic version, here are some variations to try:

  • Incline chest press machine: Focuses more on upper chest.
  • Decline chest press machine: Adds lower chest emphasis.
  • Single-arm chest press: Helps fix strength imbalances.
  • Slow tempo reps: Boosts muscle growth by increasing time under tension.
  • Drop sets: Start heavy, reduce weight each set for burnout.
  • Pause reps: Hold the press at the midpoint for added intensity.

Mix these in to keep things fresh and challenge your muscles in new ways.

So how do you actually fit the machine chest press into your routine?

Try these:

  • Push Day: Pair with shoulder presses, dips, and triceps extensions.
  • Upper Body Day: Combine with rows, pulldowns, and biceps curls.
  • Full Body Workout: Include it as your chest exercise between leg and back work.
  • Hypertrophy Split: Use it on a chest day followed by incline presses, flys, and push-ups.

You can also superset with:

  • Chest fly machine for total fatigue.
  • Cable crossovers for chest shaping.

Resistance band presses for more burn.

Common Mistakes to Avoid

Even on a machine, there are some easy-to-make mistakes:

  • Going too heavy too soon – Form matters more than weight.
  • Locking out elbows – Can stress your joints.
  • Short range of motion – Make sure you’re going all the way out and back.
  • Poor seat adjustment – This messes up your posture and range.
  • Not controlling the weight back – The return is just as important as the push.

Pay attention to your posture, elbow angle, and breathing to get the most from each rep.

This machine is useful for almost everyone:

  • Beginners: Learn proper pushing motion in a safe setup.
  • Older adults: Great for building strength without free weight risk.
  • Anyone in recovery: Low joint strain helps you train post-injury (with clearance).
  • Bodybuilders: Add volume after heavy bench sets.
  • Athletes: Train pushing strength for performance sports.

It’s also great for people who just want to tone up and build a strong-looking chest.

Want more from your chest press sessions?

Try these:

  • Warm up first: Do a few arm circles or light push-ups.
  • Focus on the squeeze: Really push at the top of each rep.
  • Progress slowly: Add weight week by week.
  • Track your lifts: Keep a log to monitor improvements.
  • Pair with stretching: Stretch your pecs after to stay limber.

While we’re all about the press, the chest fly machine deserves some love.

  • It offers more stretch than the press.
  • It’s perfect for hitting the inner chest.
  • Great for a finishing movement after heavier presses.

Use both machines back-to-back for the ultimate pump. It’s like a one-two punch for your chest muscles!

Is a chest press machine effective?

 Yes, the chest press machine is very effective for building upper body strength, especially for beginners who want to safely target their chest, shoulders, and triceps.

 Not quite—both work similar muscles, but the chest press machine offers more stability while the bench press uses free weights and requires more balance and core engagement.

 Adjust the seat so the handles are at chest level, set your weight, grab the handles, and push forward in a slow, controlled motion—don’t lock your elbows.

 It depends on your goals—the machine is great for safety and form, while dumbbells allow for more range of motion and engage stabilizer muscles.

The chest press machine is one of the most beginner-friendly and effective ways to build up your chest, arms, and shoulders. It offers support, safety, and strength-building all in one package. Add in the chest fly machine for variety, and you’ve got a solid game plan for upper body gains.

As always, talk to your trainer or healthcare provider before jumping into new workouts—especially if you’ve got injuries or concerns.

Machine or not, the work still counts. Show up, press strong, and keep chasing those gains. Your chest will thank you!

Categories
Blog

Why Back and Shoulders Matter

When it comes to feeling strong, standing tall, and avoiding back pain, your back and shoulders are the real MVPs. Whether you’re carrying groceries, picking up a kid, or just sitting with good posture, these muscles keep you stable and supported. That’s why a solid back and shoulders workout is so important.

Just a quick heads-up: we’re not doctors or personal trainers, so always listen to your body and check with a pro if something doesn’t feel right.

Why Back and Shoulders Matter

Your back and shoulders work together for nearly every upper-body movement you make. Think about lifting, pulling, or even hugging someone—those muscles are putting in work. A good shoulders and back workout can help:

  • Improve posture
  • Reduce the risk of injury
  • Support better lifting and pulling strength
  • Make everyday tasks feel easier
  • Sculpt and tone your upper body
  • Ease tension from sitting at a desk all day
  • Build confidence through better body awareness

Your back is made up of big muscles like the lats and traps, while your shoulders—mainly the deltoids—help with arm movement and stability. Both need love to stay strong and balanced.

Before we get into the workout, it’s important to wake up your muscles and prepare your joints. Warming up helps you perform better and lowers the chance of pulling something.

Try this quick warm-up (about 5 minutes total):

  • Arm circles (30 seconds forward, 30 seconds backward)
  • Torso twists (20 reps)
  • Shoulder shrugs (15 reps)
  • Cat-Cow stretch (10 rounds)
  • Jumping jacks (30 seconds)

Here’s a back and shoulders workout that requires no equipment. Just your body and a little space. You can do this in your living room, backyard, or anywhere you have a bit of room to move.

1. Push-Up to Downward Dog

This combo move builds shoulder strength and stretches your back.

  • Start in a push-up position
  • Do one push-up
  • Push your hips up into Downward Dog
  • Repeat for 10–15 reps
  • Rest and do 2–3 sets

2. Superman Hold

Great for the lower and upper back.

  • Lie on your stomach
  • Lift your arms, chest, and legs off the floor
  • Hold for 20–30 seconds
  • Rest and repeat 2–3 times

3. Wall Angels

This one helps posture and shoulder mobility.

  • Stand with your back against a wall
  • Raise arms like a goalpost, keeping elbows and hands against the wall
  • Slowly slide them up and down
  • Repeat 15 times
  • Do 2–3 rounds

4. Shoulder Taps

Works on shoulder stability and core strength.

  • Get in a push-up position
  • Tap your left shoulder with your right hand
  • Then your right shoulder with your left hand
  • Keep your hips still
  • Alternate for 30–60 seconds
  • Do 2–3 sets

5. Reverse Snow Angels

Targets your upper back and helps with posture.

  • Lie on your stomach
  • Lift arms and chest slightly off the floor
  • Move arms in a snow-angel motion (without touching the ground)
  • Do 10–15 reps
  • Repeat 2 times

6. Plank to Dolphin Pose

Strengthens shoulders and stretches the back.

  • Start in a forearm plank
  • Push your hips up into a dolphin pose (like a mini downward dog on forearms)
  • Lower back into plank
  • Do 10–12 reps
  • 2 sets

If you have a resistance band or light dumbbells, here are some simple but powerful exercises to grow strength and definition in your back and shoulders.

1. Bent-Over Rows (with band or dumbbells)

  • Hinge at your hips with a straight back
  • Pull weights or band handles toward your ribs
  • Squeeze shoulder blades together at the top
  • 12–15 reps
  • 3 sets

2. Lateral Raises

  • Stand tall with weights in each hand
  • Lift arms straight out to the sides until shoulder height
  • Slowly lower with control
  • 10–12 reps
  • 3 sets

3. Face Pulls (band only)

  • Anchor your resistance band at head height
  • Pull the band handles toward your face
  • Elbows stay high and wide
  • Squeeze your shoulder blades
  • 12–15 reps
  • 3 rounds

4. Shoulder Press (dumbbells)

  • Sit or stand with weights at shoulder height
  • Press weights up until arms are straight
  • Slowly lower back down
  • 10–12 reps
  • 3 sets

5. Resistance Band Pull-Aparts

  • Hold a resistance band in front of you with arms straight
  • Pull the band apart, stretching it across your chest
  • Keep arms at shoulder height
  • 15–20 reps
  • 3 sets

Back and Shoulders Workout Plan (Simple Weekly Guide)

Not sure how to schedule your back and shoulder work? Here’s a weekly plan that’s beginner-friendly but effective.

Day 1 – Full Body Strength

  • Include: Superman Hold, Shoulder Taps

Day 2 – Rest or Active Recovery

  • Light walk or stretch

Day 3 – Back and Shoulders Focus

  • Include: Wall Angels, Reverse Snow Angels, Lateral Raises

Day 4 – Core + Cardio

  • Great for full-body balance

Day 5 – Back, Shoulders + Arms

  • Add: Bent-Over Rows, Shoulder Press

Day 6 – Rest or Light Yoga

Day 7 – Quick Burnout Day

  • Choose 3 back and shoulder moves and go 2 rounds

Here are a few easy tips to help you get better results:

  • Go slow and steady. Fast reps don’t mean better results.
  • Feel the muscle working. When lifting or pulling, think about your back and shoulders doing the work.
  • Keep your form clean. Don’t swing weights or twist your spine.
  • Breathe. Exhale on effort (like pushing or pulling).
  • Rest when you need to. No shame in taking a water break.
  • Stretch after. Try child’s pose, forward folds, or doorway stretches for shoulders.
  • Thread-the-Needle Stretch – Opens shoulders and upper back
  • Doorway Chest Stretch – Helps counter tight shoulders
  • Seated Forward Fold – Gentle stretch for the spine
  • Eagle Arms – Loosens upper back and shoulders
  • Foam Rolling – Great for your lats and traps

Adding 5–10 minutes of stretching after your workout or on rest days helps with recovery and flexibility.

Can I do a back and shoulder workout together?

Yes! Back and shoulder exercises pair well and work many of the same muscles, so they make a great combo for one workout.

Definitely. Training them on the same day saves time and helps you build upper-body strength efficiently.

Back works great with biceps, shoulders, or even core—choose what fits your goals best.

It’s a training method with 3 exercises per muscle group: 6 heavy reps, 12 moderate reps, and 25 light reps, all done back-to-back to boost strength and endurance.

Strong muscles don’t just come from workouts—they need good fuel and rest too.

  • Hydrate – Water helps with joint health and recovery
  • Protein – Eat protein-rich foods to help muscles rebuild
  • Sleep – Aim for 7–9 hours so your body can repair
  • Rest Days – Don’t skip them! Muscles grow when resting

Even small improvements in diet and sleep can boost your workout results.

Categories
Blog

What Makes Pilates Affordable?

Looking for affordable Pilates classes near you? You’re not alone. Pilates is one of those workouts that feels great, strengthens your whole body, and helps you move better in everyday life—but finding a class that fits your budget can feel like a stretch (pun intended). Whether you’re brand new to Pilates or you’re just trying to save some money, we’ve got the scoop on how to find classes that won’t break the bank.

Let’s start with the basics. Pilates is a low-impact exercise that focuses on core strength, flexibility, and body awareness. It’s great for toning, improving posture, reducing stress, and even helping with back pain. You don’t need to be super flexible or fit to start, either. Everyone can benefit from Pilates—no matter your age, size, or skill level.

Just a friendly heads-up: We’re not doctors, and this isn’t medical advice. Always talk to a healthcare provider before starting a new fitness routine, especially if you’ve got any injuries or health concerns.

What Makes Pilates Affordable?

Pilates can range in cost depending on the type of class (mat vs. reformer), where you live, and the studio. But there are lots of ways to keep the cost down:

1. Mat Classes

Mat Pilates usually costs less than reformer classes because you don’t need the fancy equipment. Just a mat and your own bodyweight! Mat classes are offered in many places—gyms, studios, parks, or even online—and they’re a great way to build your strength without spending much.

2. Community Centers

Check your local community centers or YMCA—they often offer Pilates classes at super reasonable prices. Some places offer classes for as little as $5–$10. These classes are usually taught by certified instructors who want to help people stay healthy without financial barriers.

3. First-Time Discounts

Many studios offer first-timer packages or free trial classes. These are perfect for getting your feet wet without committing to a full-priced membership. Keep an eye out for local promotions, new studio openings, or holiday specials.

4. Group Classes

Small group classes are more affordable than private sessions and still offer plenty of guidance from the instructor. These classes let you share the cost with others while still getting professional instruction. Some gyms even offer group Pilates as part of their standard membership.

5. Online Pilates

If you don’t mind working out at home, online classes are the ultimate budget-friendly option. Platforms like YouTube, Pilates Anytime, and even fitness apps provide tons of options. Some are completely free, while others are as low as $10/month. Plus, you can work out anytime you want, no commute required.

How to Find Affordable Pilates Classes Near You

When you search for “affordable Pilates classes near me,” go beyond the first few results. Look for:

  • Local studios with beginner specials

  • Community classes or park sessions

  • College or school-run programs

  • Churches or nonprofit spaces offering donation-based classes

Ask Around

Word of mouth is still one of the best ways to find great deals. Ask your friends, coworkers, neighbors, or even your social media circle if they know of budget-friendly Pilates instructors or classes.

Social Media Groups

Join local Facebook groups, Nextdoor, or Reddit communities. These groups often share news about deals, pop-up fitness events, or instructors looking for new clients.

Fitness Apps

Apps like ClassPass, Mindbody, ZenRez, and Groupon let you browse classes near you and filter by price. You can even set a budget range and find discounted rates, especially for off-peak class times or new user promos.

Libraries and Recreation Departments

Yes, your local library or city’s rec department might host Pilates! It’s worth checking their event calendars for recurring wellness events that are often free or very low cost.

What to Expect in Your First Class

Your first Pilates class might feel a little different—don’t worry, that’s totally normal. Here’s what to expect:

  • Small, controlled movements: Pilates is all about precision and control, so you won’t be jumping or doing big motions.

  • Focus on breathing: Inhale and exhale—your instructor will cue your breath to match the movement.

  • New muscle groups: You’ll likely work deep core muscles that you don’t hit in most other workouts.

  • Minimal equipment: In mat classes, it’s usually just you and the mat. Some instructors may add bands, balls, or rings to mix things up.

Friendly vibes: Most Pilates classes are welcoming and encouraging. Everyone started as a beginner at some point!

Popular Types of Budget Pilates Options

There’s a huge world of Pilates content online. Some of our favorite free or cheap at-home options include:

  • YouTube (channels like Blogilates, Move With Nicole, and The Pilates Class)

  • Apps like FitOn, Alo Moves, or Daily Burn

  • Instagram Live or IGTV sessions

Outdoor Pilates

If the weather’s nice, some instructors offer outdoor group sessions in parks. These are often donation-based or low-cost and have a great community feel.

Nonprofit or Donation-Based Studios

Some studios operate on a pay-what-you-can basis or are connected to wellness nonprofits. These classes are especially inclusive and often focus on accessibility and mental wellness.

Student-Led or Training Sessions

When instructors are still in training, they often offer discounted sessions to gain experience. These are supervised and can be a super affordable way to learn.

Pilates vs. Other Workouts

So how does Pilates stack up to other fitness options when you’re trying to save money?

Workout Type

Average Cost per Class

Pros

Cons

Mat Pilates

$10–$25

Low-impact, builds core strength

Less cardio-intensive

Yoga

$10–$30

Relaxing, flexibility-focused

May be less targeted for strength

Reformer Pilates

$30–$50

Full-body toning, uses equipment

Higher cost

Gym Membership

$25–$75/month

Variety of classes and machines

Can feel crowded or impersonal

Online Workouts

Free–$20/month

Flexible and affordable

Requires self-motivation

Making Pilates a Long-Term Habit on a Budget

If you’re loving your affordable classes and want to stick with Pilates long-term, here’s how to keep costs down:

  • Invest in a good mat so you can practice at home between studio sessions
  • Split private lessons with a friend to get personalized attention at a lower cost
  • Mix it up: Do studio classes once a week and fill in the rest with online sessions
  • Follow instructors on social media—they often post free tips, mini workouts, and promo codes

Buy class packs: Studios often offer discounts when you buy multiple classes at once

What Should I Bring to Class?

For most affordable Pilates classes, you’ll only need:

  • A yoga or Pilates mat
  • Comfortable workout clothes
  • A water bottle
  • A small towel (optional)

Some studios will provide mats or props, but it’s always good to check ahead. And if you’re practicing at home, you can use things like a cushion, towel, or resistance band as DIY props.

What is the typical cost of a Pilates class?

Mat classes usually range from $10 to $25 per session, while reformer classes can be between $30 and $50 depending on the studio and location.

Yes, doing Pilates three times a week is a great way to build strength, improve flexibility, and see consistent progress over time.

Reformer Pilates often requires expensive equipment and small class sizes, which raise the cost. Certified instructors also invest a lot into training, which factors into pricing.

The 80/20 rule in Pilates means you focus 80% of your energy on mastering the basics with perfect form and 20% on challenging variations to keep things fresh and build strength.

When you’re paying less, the trade-off might be fewer frills—no fancy locker rooms or free smoothies. But that doesn’t mean your workout isn’t worth it! Here’s how to stay motivated:

  • Track your progress (strength, flexibility, mood)
  • Set small weekly goals (like 3 classes/week)
  • Join an accountability group or buddy up
  • Celebrate milestones—big or small!
Categories
Blog

Are French Fries Healthy? Let’s Talk Real Talk

French fries. Golden, crispy, salty. Let’s be honest—they’re a favorite for a reason. Whether it’s from a drive-thru or homemade, there’s just something comforting about a warm pile of fries. But let’s hit pause for a second and talk about the real question here: are French fries healthy?

Quick heads-up before we jump in: we’re not doctors or dietitians. We’re just fitness lovers who like to keep things real and help others make smarter choices. If you have health conditions or special dietary needs, talk to a pro before making big food changes.

The Basics: What Are French Fries, Really?

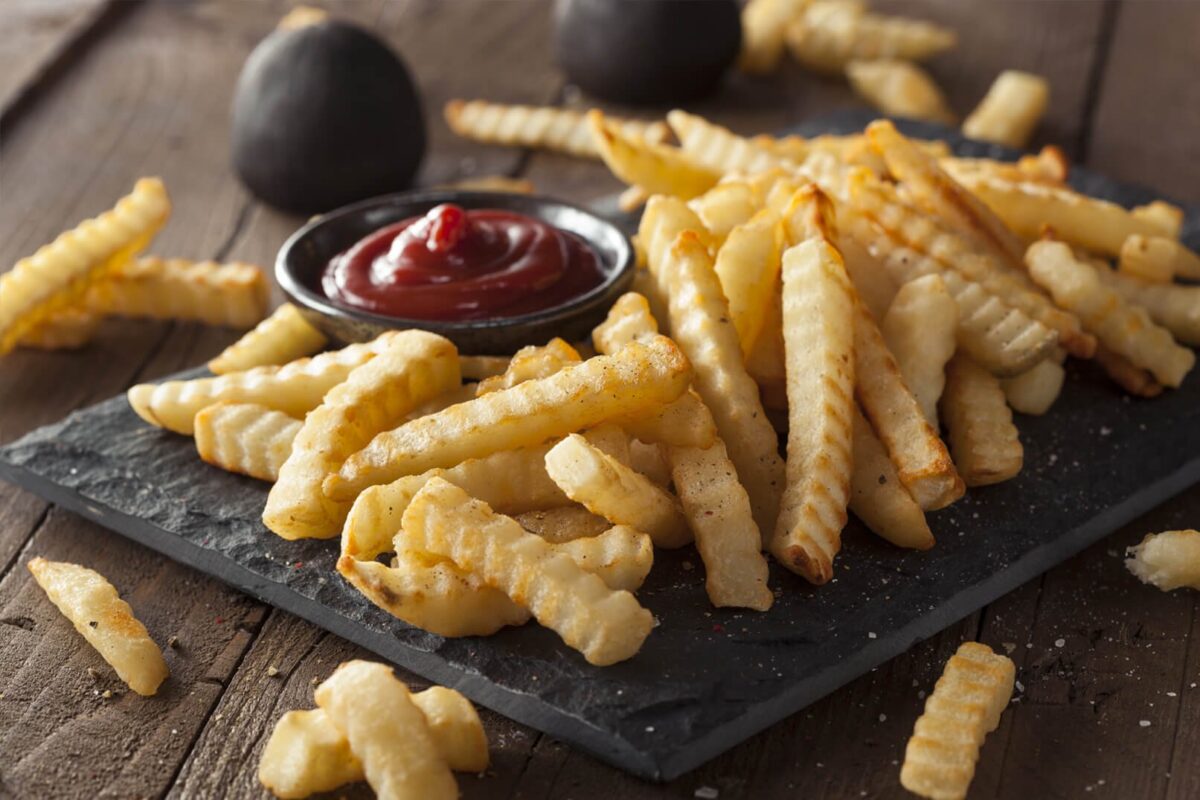
French fries are usually made by cutting up white potatoes and deep frying them in oil. Then they get salted, sometimes heavily, and served up hot. That’s the classic version. Of course, you’ve got all kinds now: crinkle cut, curly, sweet potato, waffle fries, even seasoned with truffle or garlic.

Nutritionally speaking? A regular serving of fries (around 100 grams) often contains:

  • 300-400 calories
  • 15-20 grams of fat (mostly from the oil)
  • 40-50 grams of carbs
  • 0-3 grams of fiber
  • Little to no protein

Depending on where you get them from, fries may also have preservatives, artificial flavors, and more sodium than your body needs in a whole day.

So... Are French Fries Healthy?

Here’s the deal. On their own, French fries aren’t exactly a health food. Most of the calories come from fat and carbs, especially when deep fried. And that kind of combo can quickly lead to weight gain if it becomes a regular part of your diet.

Also, many fast-food fries are cooked in highly processed oils, which may contain trans fats or unhealthy additives. That’s not great for your heart or cholesterol levels. Eating foods high in unhealthy fats over time can raise your risk of chronic conditions like obesity, high blood pressure, and heart disease.

But here’s the twist:

  • Fries aren’t evil.
  • Eating them once in a while won’t destroy your health.
  • It’s really about balance and how often you have them.

Moderation is the name of the game. If you’re someone who eats whole, nourishing meals most of the time, there’s definitely space in your lifestyle for a small serving of fries now and then.

What About Air Fried French Fries?

Now we’re talkin’. Are air fried French fries healthy? Compared to deep fried? Yup, they usually are.

Air fryers work by using hot air to crisp up the outside of the potato without soaking them in oil. You might still use a spritz of oil, but way less than traditional frying. Here’s what you get:

  • Fewer calories
  • Less fat
  • Same crispy vibe
  • Less mess in your kitchen

You still get that tasty crunch, but with much less grease. That makes air fried fries a better option if you’re watching your calories or fat intake. A medium serving of air fried fries might come in closer to 150–200 calories depending on how much oil you use.

Plus, air frying avoids some of the harmful chemical compounds created during deep frying at high temperatures—like acrylamide, which has been linked to cancer in some animal studies.

But they’re still made from potatoes, which means they’re carb-heavy. So again—balance is key.

Let’s Talk About Portion Sizes

We all know portion sizes have gotten out of hand. A “small” fry at some places looks more like a medium or large. If you’re eating a giant container of fries, that’s where things can go sideways health-wise.

Instead of eating until the container is empty, try:

  • Splitting your fries with a friend
  • Choosing a kid-size portion
  • Making a small batch at home

If you eat fries mindfully and slowly, you’ll notice you feel satisfied way sooner than you think.

Smart Swaps and Upgrades

Want to enjoy fries without the guilt? Here are some easy upgrades that still taste amazing:

  • Use olive oil or avocado oil instead of vegetable or corn oil. These have healthier fats.
  • Add herbs and spices like paprika, garlic powder, rosemary, or even a sprinkle of Parmesan instead of just loading on salt.
  • Keep the skin on for extra fiber, potassium, and antioxidants.
  • Try veggie fries made from zucchini, carrots, or even green beans. Bread them lightly and toss in the air fryer.

Small changes = big difference.

Homemade Fries: The Best of Both Worlds

When you make fries at home, you’re in control. You decide how much oil, salt, and seasoning to use. That’s a big win for your health.

Try this simple recipe:

Easy Air Fryer Fries

  • 2 medium potatoes (russet or sweet)
  • 1 tablespoon olive oil
  • Pinch of salt and pepper
  • Optional: garlic powder, paprika, or chili flakes

Slice the potatoes evenly, toss in oil and seasoning, and air fry at 400°F for 15-20 minutes. Shake halfway through. That’s it!

You can even mix it up with wedges, matchstick cuts, or crinkle cuts. Homemade gives you more variety and control over ingredients.

Real Life Scenarios

Let’s say you’re out with friends and everyone orders fries. What do you do?

  • Option A: Skip them completely and feel left out
  • Option B: Get your own large fry and eat it all
  • Option C: Share with a friend and enjoy a few mindfully

Option C is the sweet spot for most people. You’re still part of the fun, still enjoying the moment, but not going overboard. It’s all about realistic choices that fit your life.

Is it healthy to eat French fries?

Not really, especially when deep fried. But enjoying them occasionally in moderation can still be part of a balanced lifestyle.

Once a week or less is a good guideline for most people, as long as the rest of your meals are nutritious.

Yes! Just keep portions small and pair them with healthier foods like lean protein and vegetables.

They’re not the worst, but they are high in fat, salt, and calories. There are definitely healthier options, but fries aren’t the enemy if you eat them smartly.

So, are French fries healthy? Not really. But that doesn’t mean you have to give them up forever.

They’re high in calories, fat, and sodium—especially when deep fried. But eaten in moderation, and paired with healthy meals, they can absolutely have a spot in your diet.

Are air fried French fries healthy? They’re a much better pick. Same crunch, way less oil, and they still hit the spot.

At Fitness Evo, we’re all about living balanced. That means treating yourself sometimes, moving your body, and choosing better—not perfect—foods most of the time.

And remember: we’re not doctors. We’re just here to help you think about your choices with a little more info and a lot more support.

Stay smart, stay active, and enjoy your fries now and then. You’ve got this.

Categories
Blog

Arm Exercises Without Equipment: Build Strength Anywhere

We get it—life gets busy, gyms aren’t always accessible, and sometimes you just want a quick arm workout without needing to dig through drawers for resistance bands or weights. The good news? You don’t need any equipment at all to build stronger arms. You can use your own bodyweight, some smart moves, and a bit of consistency to see results.

Before We Dive In Let’s get this out of the way: We’re not doctors. So if you’ve got injuries, health concerns, or anything that might impact your movement, definitely check with a healthcare pro before jumping into any new fitness routine.

Why Arm Workouts Without Equipment Work

Bodyweight training can be just as effective as using weights when it comes to toning and strengthening your arms. The key? Form, repetition, and control. These exercises target all the major arm muscles—biceps, triceps, shoulders, and even your forearms—using only your body.

Here’s why they’re awesome:

  • No gym or gear needed
  • Easy to do at home, outside, or even in a hotel room
  • Great for beginners and scalable for pros
  • Helps build full-body stability and coordination
  • Low-impact and easy on joints
  • Can be done anywhere, anytime

When you focus on good form, use full range of motion, and really engage your muscles, you’ll be surprised at how much strength you can build—no dumbbells required.

Best Arm Exercises You Can Do Without Equipment

Bodyweight training can be just as effective as using weights when it comes to toning and strengthening your arms. The key? Form, repetition, and control. These exercises target all the major arm muscles—biceps, triceps, shoulders, and even your forearms—using only your body.

Here’s why they’re awesome:

  • No gym or gear needed

  • Easy to do at home, outside, or even in a hotel room

  • Great for beginners and scalable for pros

  • Helps build full-body stability and coordination

  • Low-impact and easy on joints

  • Can be done anywhere, anytime

When you focus on good form, use full range of motion, and really engage your muscles, you’ll be surprised at how much strength you can build—no dumbbells required.

Best Arm Exercises You Can Do Without Equipment

Let’s go over the most effective, beginner-friendly, and muscle-targeting moves you can do right now without touching a single piece of gym equipment.

1. Push-Ups

Good ol’ push-ups work your triceps, shoulders, chest, and core. Keep your hands just wider than shoulder-width apart and focus on a slow, controlled movement.

Try these variations:

  • Knee Push-Ups: Perfect if you’re just starting out

  • Diamond Push-Ups: Targets the triceps like a laser

  • Incline or Decline Push-Ups: Use a low surface to adjust intensity

Push-ups are endlessly customizable and can be scaled as your strength increases.

2. Arm Circles

They look easy… until you do them for a full minute.

How to do it:

  • Stand tall with arms extended out to the sides

  • Make small circles going forward for 30 seconds

  • Then backward for 30 seconds

Want to spice it up? Add pulses, larger circles, or extend your time.

3. Triceps Dips (Using a Chair or Step)

Okay, so technically this uses a chair or step—but if you don’t have one, the edge of a sturdy bed or a low coffee table will work.

How to do it:

  • Sit down, hands next to your hips on the edge

  • Slide your body forward and bend elbows to lower down

  • Push through your palms to lift back up

Tip: Keep those elbows tucked in to protect your shoulders.

4. Plank Shoulder Taps

This one’s sneaky. It looks like a core move, but it seriously works your arms—especially your shoulders and triceps.

How to do it:

  • Start in a high plank position (wrists under shoulders)

  • Tap your left shoulder with your right hand, then switch

  • Keep your hips as still as possible

Want more challenge? Slow it down or add a push-up after each tap.

5. Wall Push-Ups

Perfect for beginners or as a warm-up. These target your triceps and shoulders.

How to do it:

  • Stand a few feet from a wall

  • Place your hands shoulder-width apart on the wall

  • Lower your body toward the wall, then push back

To increase difficulty, use a lower surface like a countertop or bench.

6. Inchworms

A total-body movement that brings extra focus to your arms.

How to do it:

  • Stand up tall, then bend at the waist to touch the floor

  • Walk your hands forward to a plank

  • Add a push-up if you want more fire

  • Walk hands back and stand up

This move is a hidden gem for arm endurance.

7. Isometric Bicep Curls (No Weights Needed!)

You’ll look a little silly, but trust us—these burn.

How to do it:

  • Pretend you’re curling something heavy

  • Tighten your muscles as hard as you can and curl slowly

  • Hold at the top for a second, then lower slowly

The key is to really contract the muscle like you’re lifting something massive.

8. Arm Pulses

Tiny movements, big burn.

How to do it:

  • Raise your arms to shoulder height (front or sides)

  • Pulse them up and down about 1 inch

  • Go for 30-60 seconds

This keeps the muscles under constant tension—great for toning.

9. Superman Lifts

These target your shoulders, upper back, and arms.

How to do it:

  • Lie face down, arms extended forward

  • Lift arms, chest, and legs slightly off the ground

  • Hold for a beat, then lower

You’ll feel it from shoulders to glutes.

Create Your No-Equipment Arm Workout

Here’s a simple full-body circuit that emphasizes arms and can be done in under 20 minutes.

Bodyweight Arm Blaster (Repeat x3):

  • 10 Push-Ups
  • 30 seconds Arm Circles (forward + backward)
  • 10 Triceps Dips
  • 20 Plank Shoulder Taps (10 each side)
  • 10 Wall Push-Ups
  • 5 Inchworms with Push-Up
  • 10 Isometric Bicep Curls (each arm)
  • 30 seconds Arm Pulses
  • 10 Superman Lifts

Rest 30–60 seconds between rounds.

Make it harder: Add a fourth round or extend each movement to 45 seconds.

Build a Weekly Arm Workout Plan

Beginner Plan (2x a week)

  • 3 rounds of Arm Blaster Circuit
  • Light stretching before and after
  • 1 rest day between sessions

Intermediate Plan (3x a week)

  • 3-4 rounds of the circuit
  • Add push-up variations or increase reps
  • Add a bonus challenge set at the end

Advanced Plan (4x a week)

  • 4+ rounds with added core and cardio
  • Move through exercises with minimal rest
  • Try time-based rounds (45s work / 15s rest)

Remember: Recovery is part of the plan. Don’t skip it.

What is the best exercise for arms without equipment?

Push-ups are one of the best—they work several upper body muscles at once.

 Focus on consistent bodyweight workouts like push-ups, dips, and plank taps 2–3 times a week.

Yes! With bodyweight resistance and proper intensity, you can build muscle and strength.

Work your biceps and triceps with targeted moves, stay lean with cardio, and maintain a clean diet to show definition.

Arm strength is built in the gym—but revealed through lifestyle. Make sure you:

  • Eat enough protein to support muscle repair
  • Stay hydrated to help with energy and recovery
  • Sleep 7–9 hours a night
  • Manage stress to avoid fatigue

Also, try to include full-body strength and movement in your week so everything stays in balance.

Categories
Blog

At Home Workouts (No Equipment Needed): A Simple Plan for Everyone

Looking to get fit from home without buying any fancy gear? You’re in the right place. This guide is all about at home workouts with no equipment. We’ll help you build an at home workout plan without equipment that actually works—no matter your fitness level. Just a heads-up: we’re not doctors, so always check with a professional before starting something new.

Why At Home Workouts with No Equipment Are Awesome

You don’t need a gym or expensive tools to get stronger, feel better, and move more. A good workout at home with no equipment can help you:

  • Build muscle
  • Burn calories
  • Improve flexibility
  • Boost your mood
  • Stick to a routine

And the best part? You can do it in your living room, bedroom, or even outside.

You don’t need a treadmill or dumbbells. But a few little things make your at-home workouts easier and more fun:

  • Comfy clothes you can move in
  • A water bottle to stay hydrated
  • Floor space the size of a yoga mat
  • A little motivation (even just a post-it note reminder)

That’s it. Let’s get moving!

We designed this plan so you can repeat it weekly or build your own from it. It targets your full body with just your body weight. Here’s a simple weekly breakdown:

Day 1: Full Body

  • 30 seconds jumping jacks
  • 10 push-ups (on knees if needed)
  • 15 squats
  • 20 mountain climbers
  • 30 second plank
  • Repeat 3x

This combo wakes up all your major muscles. It also gets your heart rate up for a bit of cardio. It’s a great way to start the week.

Day 2: Core Focus

  • 20 crunches
  • 15 leg lifts
  • 30 second side plank (each side)
  • 20 Russian twists
  • 30 second standard plank
  • Repeat 3x

Your core keeps your whole body strong and stable. This day helps tone your abs and strengthen your back too.

Day 3: Active Recovery

  • 5-10 minute walk or stretch
  • Focus on deep breathing
  • Optional: Try a short mobility video

Don’t skip this day. Your body needs rest to grow stronger. Gentle movement helps prevent soreness and injury.

Day 4: Lower Body

  • 15 squats
  • 10 lunges per leg
  • 15 glute bridges
  • 30 second wall sit
  • 15 calf raises
  • Repeat 3x

Leg day builds power in your hips, thighs, and calves. Plus, these moves help with balance, posture, and joint health.

Day 5: Upper Body

  • 10 push-ups
  • 30 second plank taps
  • 10 tricep dips (use a chair or couch)
  • 15 arm circles (each direction)
  • 20 shoulder taps
  • Repeat 3x

This day helps tone your arms, shoulders, and chest. Even without weights, your muscles will feel the burn.

Day 6: Full Body + Cardio

  • 20 jumping jacks
  • 10 burpees
  • 15 squats
  • 10 push-ups
  • 30 second plank
  • Repeat 3x

Cardio and strength? Yep. This day combines both to torch calories and challenge your endurance.

Day 7: Rest or Gentle Yoga

  • Try light stretching or a 10-minute yoga flow
  • Breathe deeply
  • Reflect on how your body feels

You’ve earned this. A little self-care keeps you consistent.

Why Bodyweight Workouts Work

Bodyweight exercises are underrated. They use your own body as resistance, which builds functional strength. That means your muscles get better at doing real-life things—like carrying groceries, climbing stairs, or playing with your kids.

They also help improve balance and coordination. And you can make almost any move easier or harder just by changing speed or reps. More reps? Harder. Slower movements? Way harder.

Here’s a few all-star moves and what they help with:

  • Push-ups: Chest, shoulders, triceps
  • Planks: Core, posture, endurance
  • Squats: Glutes, quads, calves
  • Lunges: Legs, balance, flexibility
  • Mountain climbers: Cardio, core, agility

They may be simple, but they get results.

That’s perfect. You don’t need to be fit to start—you just need to start. Take it slow, and don’t be afraid to modify the moves:

  • Push-ups on knees
  • Half squats instead of deep ones
  • Hold planks for 10 seconds, not 30

Already got a good fitness base? You can level up without adding equipment:

  • Add more reps or rounds
  • Try harder variations (jump squats, plyo lunges, decline push-ups)
  • Reduce rest time between sets
  •  

Working out at home sounds easy—but staying motivated can be tough. Here are a few tricks to help:

  • Pick the same time each day. Make it a habit.
  • Write down your workouts. Cross them off when done.
  • Use a playlist or podcast. Music makes everything better.
  • Follow along with a video. Sometimes it helps to have a “coach.”
  • Set small goals. Like “5 days this week” or “plank 10 more seconds.”

Want to mix it up? Here are bonus moves you can add to your plan:

  • Inchworms (great for hamstrings and shoulders)
  • Supermans (targets your back)
  • Bear crawls (full body and cardio)
  • High knees (great warm-up)
  • Reverse lunges (kinder on knees)
  • Chair step-ups (use a sturdy surface)

All of these work with just your body—and maybe a chair.

How to Build Your Own At Home Workout No Equipment Plan

If you want to mix and match, here’s a basic formula:

  1. Warm-Up (2-3 mins)
    • March in place, jump rope, or do light jumping jacks
  2. Main Workout (10-20 mins)
    • Pick 4-5 moves
    • Do each for 30 seconds to 1 minute
    • Rest 30 seconds in between
    • Repeat 2-4 rounds
  3. Cool Down (2-5 mins)
    • Stretch your arms, legs, and back
    • Take deep breaths

Simple. Flexible. Effective.

What is the best workout with no equipment?

A full-body circuit with squats, push-ups, planks, and jumping jacks covers strength and cardio.

Yes, if done consistently with intensity, 20 minutes can make a big impact.

It’s a simple method: 3 exercises, 3 sets, 3 times a week—great for beginners.

Absolutely! Bodyweight moves like push-ups, squats, and lunges help build strong, lean muscle.

A workout at home with no equipment isn’t just for “when the gym’s closed.” It can be your go-to routine anytime, anywhere. It’s perfect for busy days, travel days, or just when you want to move at your own pace.

The most important thing? Just keep going. Whether you do one push-up or fifty, what matters is that you showed up for yourself. You’re building strength—inside and out.

Remember, every drop of sweat, every plank, and every squat adds up. Keep it up, and let your home be your gym.

Categories
Blog

What Are Lifting Straps?

Lifting straps are usually made from tough materials like cotton, nylon, or leather. You wrap them around your wrist and the barbell (or dumbbell) to help you keep a strong grip when your hands start to get tired. They’re super helpful for pulling exercises like deadlifts, rows, shrugs, and lat pulldowns.

They don’t replace your grip strength, but they do take some of the pressure off your hands and let your bigger muscles do more of the work. Plus, they can make your workouts safer and more effective.

Some styles offer more comfort while others provide maximum strength and security. Knowing which type is right for you depends on your lifting style, experience, and goals.

Here are a few great reasons to add lifting straps to your gym bag:

  • Grip assistance – Perfect for when your hands are sweaty or worn out.
  • Lift heavier – You can focus more on your back, shoulders, or hamstrings and less on your grip.
  • Better form – You’re not fighting to hold on, so you can move more smoothly.
  • Injury prevention – Less strain on your wrists and fingers.
  • Less fatigue – Save your grip for other movements or days when you don’t use straps.
  • Versatility – Works on barbells, dumbbells, cable attachments, and even pull-up bars.

Note: We’re not doctors, so please talk to a professional if you have injuries or concerns.

Before you hit “add to cart,” here are a few things to consider:

  • Material: Cotton is comfy and easy to break in, nylon is super tough and long-lasting, and leather offers a strong grip with a classic feel.
  • Length and width: Longer straps (around 20″) give you more wraps for extra grip. Wider straps offer more support.
  • Padding: Some straps come with wrist padding for extra comfort.
  • Style: Figure 8 straps, lasso straps, and closed-loop straps all have their own benefits.
  • Durability: Look for double stitching or reinforced areas if you plan to go heavy.
  • Ease of use: You want straps you can throw on quickly between sets.

Let’s look at the top types so you can find the right one for you.

Types of Lifting Straps

1. Lasso Straps

These are the most common. They loop around your wrist and then you wrap the end around the bar. They’re great for beginners and work well for almost any pull movement.

Pros: Easy to use, great for beginners, adjustable tightness

Cons: Can take time to wrap if you’re moving quickly

Best for: Deadlifts, rows, general lifting

2. Figure 8 Straps

These look like the number 8 and loop around both your wrist and the bar. They’re super secure but not adjustable mid-lift.

Pros: Maximum security, great for max weight

Cons: Less versatile, harder to use for varied lifts

Best for: Strongman lifts, heavy deadlifts

3. Closed Loop Straps

These slip over your hand and tighten as you grip the bar. They’re quick to put on and great for Olympic lifts or fast-paced training.

Pros: Fast transitions, minimal setup

Cons: May not be as secure as other types for very heavy lifts

Best for: Weightlifting, quick transitions

1. Gymreapers Lifting Straps

  • Cotton build with neoprene wrist padding

  • Strong grip and long-lasting durability

  • Good for deadlifts and heavy pulls

  • Trusted by many lifters from beginners to pros

2. Rogue Fitness Ohio Lifting Straps

  • Nylon material built to last

  • Made by a trusted fitness brand

  • Slightly stiff at first, but break in well

  • Perfect for anyone wanting pro-level gear

3. IronMind Strong-Enough Lifting Straps

  • Used by professional strongmen

  • Heavy-duty cotton webbing

  • Perfect for max-effort lifts

  • Very basic design, but extremely reliable

4. Harbinger Padded Cotton Lifting Straps

  • Soft cotton feel with extra cushion

  • Great for people who want comfort

  • Best for intermediate lifters

  • Budget-friendly and easy to find

5. Warm Body Cold Mind Figure 8 Straps

  • Designed by Olympic lifter Oleksiy Torokhtiy

  • Built for max security and grip

  • Ideal for heavy deadlift days

  • Unique color and design for a cool look

6. Grip Power Pads Pro Lifting Straps

  • Leather design with padding

  • Good for grip and wrist support

  • Stylish and effective

  • Excellent for lifters who want a traditional leather feel

7. DMoose Lifting Straps

  • Neoprene padding and heavy cotton

  • Comes in fun colors and patterns

  • Adjustable and beginner-friendly

  • Popular with casual and serious gym-goers alike

8. Bear KompleX Figure 8 Straps

  • Great for secure grip with minimal slippage

  • Best for strongman and powerlifting training

  • Heavy-duty with reinforced stitching

  • Strong choice for high-level lifters

Tips For Using Lifting Straps

  • Use them smart: Don’t rely on them for every lift. Build your natural grip too.
  • Wrap tight: Make sure they’re snug on the bar, but not cutting off your circulation.
  • Practice first: Try them out with lighter weights so you can get used to wrapping them quickly.
  • Pair them well: Use them on back day or any pulling workouts where grip limits your gains.
  • Take care of them: Wash fabric straps occasionally to keep them clean and fresh.
  • Try different styles: Don’t be afraid to experiment. Some people love lasso straps, while others swear by figure 8s.
  • Track your progress: Keep note of how straps help your lifts so you can adjust over time.

Use them when:

  • You’re lifting heavier than your grip can handle
  • You’re training back, hamstrings, or other pull-focused movements
  • You want to reduce fatigue on your hands and wrists
  • You’re recovering from a hand or wrist injury (with clearance from your doctor)

Don’t use them when:

  • You’re trying to build grip strength
  • You’re warming up or lifting light
  • You’re doing pushing movements (bench press, shoulder press, etc.)
  • You don’t know how to wrap them properly yet
What type of lifting straps are best?

The best type depends on your workout. Lasso straps are great for general lifting, figure 8 straps are ideal for max-effort pulls, and closed-loop straps are perfect for quick transitions like in Olympic lifts.

Popular choices include Gymreapers for all-around use, Rogue Fitness for durability, and IronMind for heavy lifting. It comes down to comfort, grip, and your personal training style.

Figure 8 straps offer a more secure grip for heavy lifts, while lasso straps are more versatile and adjustable. Pick based on how you lift.

Yes! If your grip limits your progress, gym straps help you lift more and focus on the muscles you’re targeting without worrying about your hands giving out.

If your grip is holding you back from lifting heavier or getting the most out of your workouts, lifting straps are definitely worth trying. They can help you push harder, stay safer, and feel stronger — all while giving your hands a little break.

Whether you’re brand new to the gym or a seasoned lifter, the right straps can make a big difference.

Just remember: your grip matters too, so train it on days you don’t use straps. That way, you get the best of both worlds.